<?xml version="1.0" encoding="utf-8"?>
<feed xmlns="http://www.w3.org/2005/Atom" xmlns:dc="http://purl.org/dc/elements/1.1/" xmlns:thr="http://purl.org/syndication/thread/1.0">
    <title>RADIO KITS IN JA　: トーン信号　発生基板</title>
    <link rel="self" type="application/atom+xml" href="http://www.radiokits.jp/radio_kit_/tone_gene1/atom.xml" />
    <link rel="alternate" type="text/html" href="http://www.radiokits.jp/radio_kit_/" />
    
    <id>tag:app.dcnblog.jp,2003:weblog-358158</id>
    <updated>2019-05-05T22:17:46+09:00</updated>
    <subtitle>信州安曇野発アナログ工作中心blogです。電子工作派にお手伝い用基板１、基板2、基板3、基板4を領布中
 6Z-DH3Aのヒーターピンは必ず1番を接地。間抜けは6番ピンを接地する　　6Z-DH3Aのピン　接続情報 　amazon等での転売shopが多数ありますが、私とは無関係です。騙されぬようにご注意ください。トランジスタラジオキット,真空管短波ラジオ、真空管レフレックスラジオ、AMワイヤレスマイク、FMワイヤレスマイク、12AU7ダイレクトコンバージョン製作。LC7265ラジオ周波数表示器、ミニワッター、トランジスタアンプ、メロディic スピーカーの鳴る単球ラジオなど計 610例。 真空管ラジオ修理記やFMチューナー修理記など。20代は半導体ラジオ修理技術者でした。FA機械設計屋を35年やってます。画像多数にてPC推奨します。 資料画像等はお持ち帰りいただいてOKです。記事にする折には、ご一報ください。
since 2011/Aug</subtitle>
    <entry>
        <title>ツートーン信号発生基板をキットにしました。for  ssb tx.</title>
        <link rel="alternate" type="text/html" href="http://www.radiokits.jp/radio_kit_/2019/05/post-e89d.html" />
        <link rel="replies" type="text/html" href="http://www.radiokits.jp/radio_kit_/2019/05/post-e89d.html" thr:count="0" />
        <id>tag:app.dcnblog.jp,2003:post-58837171</id>
        <published>2019-05-05T22:17:46+09:00</published>
        <updated>2019-05-06T08:33:06+09:00</updated>
        <summary>********************** ツートーン信号発生基板キットとして...</summary>
        <author>
            <name>takinx</name>
        </author>
        <category scheme="http://www.sixapart.com/ns/types#category" term="トーン信号　発生基板" />
        <category scheme="http://www.sixapart.com/ns/types#category" term="録録　★" />
        
        
<content type="html" xml:base="http://www.radiokits.jp/radio_kit_/">
<![CDATA[
<div xmlns="http://www.w3.org/1999/xhtml"><p></p>
<p></p>
<p>**********************</p>
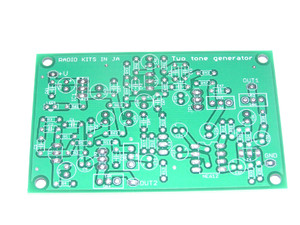
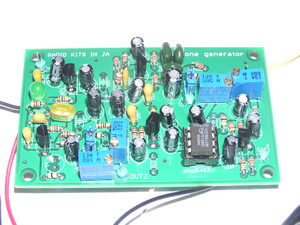
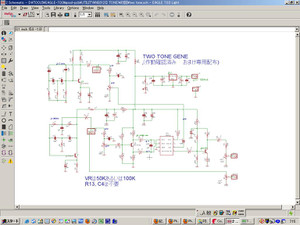
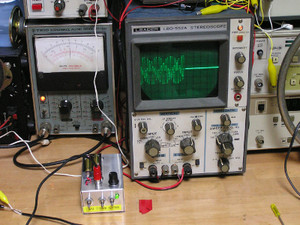
<p>ツートーン信号発生基板キットとして取り扱い中。　5石＋1ICなのでビギナー向きではないように想うが、波形を見る道具があればまとめられる。</p>
<p>乗算　あるいは　加算　での波形を選択使用する。</p>
<p><a href="http://takinx.dcnblog.jp/.shared/image.html?/photos/uncategorized/2018/11/26/tone411.jpg" onclick="window.open( this.href, '_blank', 'width=800,height=600,scrollbars=no,resizable=no,toolbar=no,directories=no,location=no,menubar=no,status=no,left=0,top=0' ); return false"><img class="asset  asset-image at-xid-photo-56196068" style="width: 300px; display: block;" title="Tone411" src="http://takinx.dcnblog.jp/radio_kit_/images/2018/11/26/tone411.jpg" alt="Tone411" /></a></p>
<p>JH1FCZ氏考案のキットは3石(加算式)なので、それよりは部品数が多い。</p>
<p></p>
<p><br /><br />①</p>
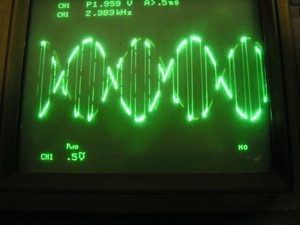
<p>生成波形(乗算)</p>
<p><a href="http://takinx.dcnblog.jp/.shared/image.html?/photos/uncategorized/2019/05/05/tone4.jpg" onclick="window.open( this.href, '_blank', 'width=800,height=600,scrollbars=no,resizable=no,toolbar=no,directories=no,location=no,menubar=no,status=no,left=0,top=0' ); return false"><img class="asset  asset-image at-xid-photo-56510857" style="width: 300px; display: block;" title="Tone4" src="http://takinx.dcnblog.jp/radio_kit_/images/2019/05/05/tone4.jpg" alt="Tone4" /></a></p>
<p></p>
<p></p>
<p><br /><br /></p>
<p>②</p>
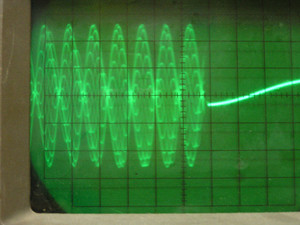
<p>生成波形(加算回路) ⇒　市場流通はこの回路のみ。</p>
<p><a href="http://takinx.dcnblog.jp/.shared/image.html?/photos/uncategorized/2019/05/05/tone02.jpg" onclick="window.open( this.href, '_blank', 'width=800,height=600,scrollbars=no,resizable=no,toolbar=no,directories=no,location=no,menubar=no,status=no,left=0,top=0' ); return false"><img class="asset  asset-image at-xid-photo-56510859" style="width: 300px; display: block;" title="Tone02" src="http://takinx.dcnblog.jp/radio_kit_/images/2019/05/05/tone02.jpg" alt="Tone02" /></a></p>
<p></p>
<p><a href="http://takinx.dcnblog.jp/.shared/image.html?/photos/uncategorized/2019/05/05/tone406.jpg" onclick="window.open( this.href, '_blank', 'width=800,height=474,scrollbars=no,resizable=no,toolbar=no,directories=no,location=no,menubar=no,status=no,left=0,top=0' ); return false"><img class="asset  asset-image at-xid-photo-56510858" style="width: 300px; display: block;" title="Tone406" src="http://takinx.dcnblog.jp/radio_kit_/images/2019/05/05/tone406.jpg" alt="Tone406" /></a></p>
<p></p>
<p><br /><br /></p>
<p>・JA1BLV関根OMが、「ssb tx調整にはスイッチング波形を使う」旨を申された記事が印刷物で存在する。</p>
<p>・スイッチング波形がmustであれば上記①の波形になる。</p>
<p>・おそらくは2.7kHz（スイッチング波形)と　350Hz(スイッチング波形)を加算して入れろだろう。何故なら音声信号の波形は細かいパルスの連続だから、パルス(スイッチング）波形を使えとのことだろう。スィッチング周波数は可聴上限側の15kHzや20kHzが良いだろう。このご時世でこの方式を提唱しても、受け止める側から「なんだそれ」で終わりになる。</p>
<p>・JA1BLV氏提唱の方式が行える基板として本基板は興してある。CR値を変えて2枚使用で対応する。</p>
<p>・オイラの本業は機械設計屋なので、電気で使う数式をやや苦手とする。phone 調整時に乗算と加算の差が数式で表示されるのかがはっきりと分からない。</p>
<p></p>
<p><a href="https://auctions.yahoo.co.jp/seller/takinx" onclick="window.open( this.href, '_blank', 'width=156,height=110,scrollbars=no,resizable=no,toolbar=no,directories=no,location=no,menubar=no,status=no,left=0,top=0' ); return false"><img class="asset  asset-image at-xid-photo-56075784" style="width: 100px; display: block;" title="Ans01" src="http://takinx.dcnblog.jp/radio_kit_/images/2018/10/08/ans01.jpg" alt="Ans01" /></a></p>
<p></p></div>
]]>
</content>


    </entry>
    <entry>
        <title>ツートーン信号発生　基板 。　　乗算回路と加算回路の学習に、、。</title>
        <link rel="alternate" type="text/html" href="http://www.radiokits.jp/radio_kit_/2018/08/post-2fa6.html" />
        <link rel="replies" type="text/html" href="http://www.radiokits.jp/radio_kit_/2018/08/post-2fa6.html" thr:count="0" />
        <id>tag:app.dcnblog.jp,2003:post-58592399</id>
        <published>2018-08-31T23:02:59+09:00</published>
        <updated>2018-09-01T13:57:33+09:00</updated>
        <summary>先日の乗算回路学習の続である。 2つの周波数のAF信号を　①　加算回路　あるいは...</summary>
        <author>
            <name>takinx</name>
        </author>
        <category scheme="http://www.sixapart.com/ns/types#category" term="トーン信号　発生基板" />
        
        
<content type="html" xml:base="http://www.radiokits.jp/radio_kit_/">
<![CDATA[
<div xmlns="http://www.w3.org/1999/xhtml"><p></p>
<p>先日の<a href="http://takinx.dcnblog.jp/radio_kit_/2018/08/post-3.html">乗算回路学習</a>の続である。</p>
<p>2つの周波数のAF信号を　①　加算回路　あるいは　②乗算回路　で出力させる基板を興した。</p>
<p>乗算回路にはNE612を採用した。</p>
<p>目的は回路学習　と　NE612の選別基板。　NE612は外部抵抗で動作点調整を行なえないので　時々　波形が綺麗でないものに遭遇する。　割合にWEB上でそれが見つかる。</p>
<p>低周波発振は　「twin-t発振回路」と「移相発振回路」をそれぞれ載せているので、CRを変化させて波形の変化具合を学んでもよい。</p>
<p></p>
<p>◇</p>
<p>乗算による出力。</p>
<p><a href="http://takinx.dcnblog.jp/.shared/image.html?/photos/uncategorized/2018/08/31/402.jpg" onclick="window.open( this.href, '_blank', 'width=800,height=600,scrollbars=no,resizable=no,toolbar=no,directories=no,location=no,menubar=no,status=no,left=0,top=0' ); return false"><img class="asset  asset-image at-xid-photo-55993811" style="width: 300px; display: block;" title="402" src="http://takinx.dcnblog.jp/radio_kit_/images/2018/08/31/402.jpg" alt="402" /></a></p>
<p></p>
<p>NE612の1番PIN,2番PINに程よく信号をいれた波形。</p>
<p><a href="http://takinx.dcnblog.jp/.shared/image.html?/photos/uncategorized/2018/08/31/401.jpg" onclick="window.open( this.href, '_blank', 'width=800,height=600,scrollbars=no,resizable=no,toolbar=no,directories=no,location=no,menubar=no,status=no,left=0,top=0' ); return false"><img class="asset  asset-image at-xid-photo-55993809" style="width: 300px; display: block;" title="401" src="http://takinx.dcnblog.jp/radio_kit_/images/2018/08/31/401.jpg" alt="401" /></a></p>
<p></p>
<p>****</p>
<p>強めにいれるとこうなる。</p>
<p><a href="http://takinx.dcnblog.jp/.shared/image.html?/photos/uncategorized/2018/08/31/403.jpg" onclick="window.open( this.href, '_blank', 'width=800,height=600,scrollbars=no,resizable=no,toolbar=no,directories=no,location=no,menubar=no,status=no,left=0,top=0' ); return false"><img class="asset  asset-image at-xid-photo-55993816" style="width: 300px; display: block;" title="403" src="http://takinx.dcnblog.jp/radio_kit_/images/2018/08/31/403.jpg" alt="403" /></a></p>
<p>　◇</p>
<p>加算による出力</p>
<p><a href="http://takinx.dcnblog.jp/.shared/image.html?/photos/uncategorized/2018/08/31/404.jpg" onclick="window.open( this.href, '_blank', 'width=800,height=600,scrollbars=no,resizable=no,toolbar=no,directories=no,location=no,menubar=no,status=no,left=0,top=0' ); return false"><img class="asset  asset-image at-xid-photo-55993818" style="width: 300px; display: block;" title="404" src="http://takinx.dcnblog.jp/radio_kit_/images/2018/08/31/404.jpg" alt="404" /></a></p>
<p></p>
<p><a href="http://takinx.dcnblog.jp/.shared/image.html?/photos/uncategorized/2018/08/31/405.jpg" onclick="window.open( this.href, '_blank', 'width=800,height=600,scrollbars=no,resizable=no,toolbar=no,directories=no,location=no,menubar=no,status=no,left=0,top=0' ); return false"><img class="asset  asset-image at-xid-photo-55993824" style="width: 300px; display: block;" title="405" src="http://takinx.dcnblog.jp/radio_kit_/images/2018/08/31/405.jpg" alt="405" /></a></p>
<p>******************</p>
<p>上記のように　乗算と加算では波形が違う。</p>
<p>Freq1 =350Hz ネライ</p>
<p>Freq2 =2.35kHz　ネライにしてある。</p>
<p>基板ナンバー　RK-24 になる。</p>
<p></p>
<p><a href="http://takinx.dcnblog.jp/.shared/image.html?/photos/uncategorized/2018/09/01/406.jpg" onclick="window.open( this.href, '_blank', 'width=800,height=474,scrollbars=no,resizable=no,toolbar=no,directories=no,location=no,menubar=no,status=no,left=0,top=0' ); return false"><img class="asset  asset-image at-xid-photo-55994070" style="width: 300px; display: block;" title="406" src="http://takinx.dcnblog.jp/radio_kit_/images/2018/09/01/406.jpg" alt="406" /></a></p>
<p></p>
<p><a href="http://takinx.dcnblog.jp/.shared/image.html?/photos/uncategorized/2018/09/01/tone01.jpg" onclick="window.open( this.href, '_blank', 'width=800,height=600,scrollbars=no,resizable=no,toolbar=no,directories=no,location=no,menubar=no,status=no,left=0,top=0' ); return false"><img class="asset  asset-image at-xid-photo-55994093" style="width: 300px; display: block;" title="Tone01" src="http://takinx.dcnblog.jp/radio_kit_/images/2018/09/01/tone01.jpg" alt="Tone01" /></a></p></div>
]]>
</content>


    </entry>
    <entry>
        <title>ツートーン信号発生　基板(乗算回路)を興して、通電確認した。</title>
        <link rel="alternate" type="text/html" href="http://www.radiokits.jp/radio_kit_/2018/08/post-3.html" />
        <link rel="replies" type="text/html" href="http://www.radiokits.jp/radio_kit_/2018/08/post-3.html" thr:count="0" />
        <id>tag:app.dcnblog.jp,2003:post-58577752</id>
        <published>2018-08-16T09:40:59+09:00</published>
        <updated>2018-08-25T08:13:39+09:00</updated>
        <summary>************************** 乗算回路によるツートーン信...</summary>
        <author>
            <name>takinx</name>
        </author>
        <category scheme="http://www.sixapart.com/ns/types#category" term="50MHz AM 受信基板　HF/VHF向 (TDA1072)" />
        <category scheme="http://www.sixapart.com/ns/types#category" term="pcb基板化　作業ファイル" />
        <category scheme="http://www.sixapart.com/ns/types#category" term="トーン信号　発生基板" />
        
        
<content type="html" xml:base="http://www.radiokits.jp/radio_kit_/">
<![CDATA[
<div xmlns="http://www.w3.org/1999/xhtml"><p></p>
<p>**************************</p>
<p>乗算回路によるツートーン信号発生基板を興してみた。　「加算回路によるツートーン信号発生基板」が主流であり雑誌等でもお馴染だが、　「ツートーン信号生成において　加算　又は乗算　どちらが良いのか？」を確認してみようと基板化した。</p>
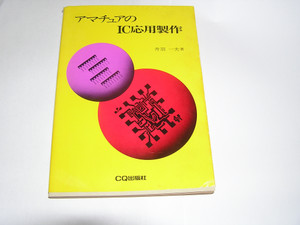
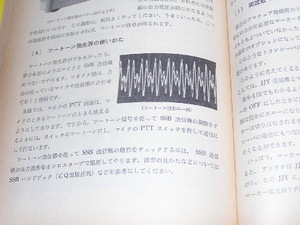
<p>まず、JA1AYO 丹羽OM執筆の「アマチュアのIC応用製作」(1976刊行)の122頁記載の写真をみると、乗算回路にて生成された「ツートーン信号」に似ている。　加算回路ではこのようになかなか為らない。</p>
<p></p>
<p><a href="http://takinx.dcnblog.jp/.shared/image.html?/photos/uncategorized/2018/08/16/049.jpg" onclick="window.open( this.href, '_blank', 'width=800,height=600,scrollbars=no,resizable=no,toolbar=no,directories=no,location=no,menubar=no,status=no,left=0,top=0' ); return false"><img class="asset  asset-image at-xid-photo-55964590" style="width: 300px; display: block;" title="049" src="http://takinx.dcnblog.jp/radio_kit_/images/2018/08/16/049.jpg" alt="049" /></a></p>
<p></p>
<p></p>
<p><a href="http://takinx.dcnblog.jp/.shared/image.html?/photos/uncategorized/2018/08/16/050.jpg" onclick="window.open( this.href, '_blank', 'width=800,height=600,scrollbars=no,resizable=no,toolbar=no,directories=no,location=no,menubar=no,status=no,left=0,top=0' ); return false"><img class="asset  asset-image at-xid-photo-55964593" style="width: 300px; display: block;" title="050" src="http://takinx.dcnblog.jp/radio_kit_/images/2018/08/16/050.jpg" alt="050" /></a></p>
<p>「ツートーン信号の一例」と云うことで「記載された回路によるものではないような表現もある」。乗算時の輪郭線が見えないので、加算回路で周波数比がぴたり整数ならば、写真波形になる可能性もある。</p>
<p>また、SSB-TX調整時には、パルス変調によるトーン信号が推奨されていることはご存知の通りである。古書にさらっと記述がある。</p>
<p>一連のeagle cadを使った基板化作業は　<a href="http://takinx.dcnblog.jp/radio_kit_/make-pcb/">ここに公開</a>してある。</p>
<p></p>
<p>1,</p>
<p>上記理由により、「乗算回路でのツートーン信号発生　基板」を作成した。</p>
<p>乗算回路には　200MHzまで作動するとされているNE612。(50MHzでの乗算作動は確認済み)</p>
<p>MC1496は50MHzでの乗算作動は非常に苦しいことを実験で確認済み。加算作動にしかならなかったのでもっと工夫が必要かも知れん。</p>
<p><a href="http://takinx.dcnblog.jp/.shared/image.html?/photos/uncategorized/2018/08/16/051.jpg" onclick="window.open( this.href, '_blank', 'width=800,height=600,scrollbars=no,resizable=no,toolbar=no,directories=no,location=no,menubar=no,status=no,left=0,top=0' ); return false"><img class="asset  asset-image at-xid-photo-55964597" style="width: 300px; display: block;" title="051" src="http://takinx.dcnblog.jp/radio_kit_/images/2018/08/16/051.jpg" alt="051" /></a></p>
<p></p>
<p><a href="http://takinx.dcnblog.jp/.shared/image.html?/photos/uncategorized/2018/08/16/052.jpg" onclick="window.open( this.href, '_blank', 'width=800,height=600,scrollbars=no,resizable=no,toolbar=no,directories=no,location=no,menubar=no,status=no,left=0,top=0' ); return false"><img class="asset  asset-image at-xid-photo-55964598" style="width: 300px; display: block;" title="052" src="http://takinx.dcnblog.jp/radio_kit_/images/2018/08/16/052.jpg" alt="052" /></a></p>
<p></p>
<p>AFの発振には、「移相発振回路」と「ツイン　Ｔ　発振回路」にした。Twin t oscillatorについては<a href="https://en.wikipedia.org/wiki/RC_oscillator">wikipedia</a>参照。</p>
<p></p>
<p>2,</p>
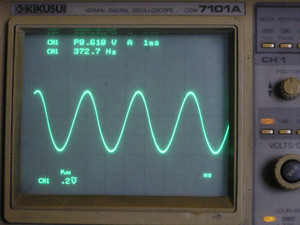
<p>twin t osc で低い側を発振させた。</p>
<p>思いのほか「twin t oscでは発振強度が上がらない」。0.6V程度には為った。(別基板では1.2vまで出たので半導体による個体差？)</p>
<p>NE612には　0.2Vも注入すればOKなので　3倍近くOSCしたので良し。</p>
<p>発振周波数は最終的に350Hzにした。</p>
<p><a href="http://takinx.dcnblog.jp/.shared/image.html?/photos/uncategorized/2018/08/16/053.jpg" onclick="window.open( this.href, '_blank', 'width=800,height=600,scrollbars=no,resizable=no,toolbar=no,directories=no,location=no,menubar=no,status=no,left=0,top=0' ); return false"><img class="asset  asset-image at-xid-photo-55964604" style="width: 300px; display: block;" title="053" src="http://takinx.dcnblog.jp/radio_kit_/images/2018/08/16/053.jpg" alt="053" /></a></p>
<p></p>
<p>3,</p>
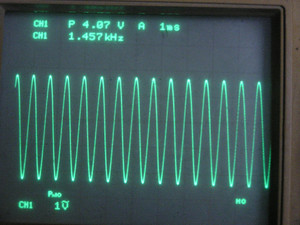
<p>移相発振でのOSCは充分だ。</p>
<p>発振周波数は最終的に2.4kHzにした。</p>
<p><a href="http://takinx.dcnblog.jp/.shared/image.html?/photos/uncategorized/2018/08/16/054.jpg" onclick="window.open( this.href, '_blank', 'width=800,height=600,scrollbars=no,resizable=no,toolbar=no,directories=no,location=no,menubar=no,status=no,left=0,top=0' ); return false"><img class="asset  asset-image at-xid-photo-55964608" style="width: 300px; display: block;" title="054" src="http://takinx.dcnblog.jp/radio_kit_/images/2018/08/16/054.jpg" alt="054" /></a></p>
<p>4,</p>
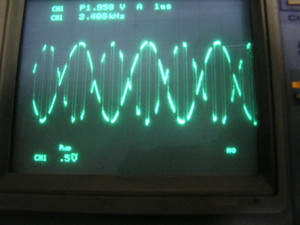
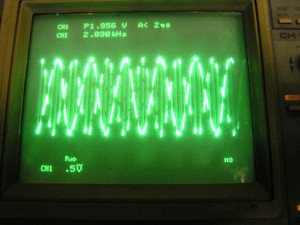
<p>350Hzと2.4kHzなので粗めの乗算波形になる。</p>
<p><a href="http://takinx.dcnblog.jp/.shared/image.html?/photos/uncategorized/2018/08/16/055.jpg" onclick="window.open( this.href, '_blank', 'width=800,height=600,scrollbars=no,resizable=no,toolbar=no,directories=no,location=no,menubar=no,status=no,left=0,top=0' ); return false"><img class="asset  asset-image at-xid-photo-55964614" style="width: 300px; display: block;" title="055" src="http://takinx.dcnblog.jp/radio_kit_/images/2018/08/16/055.jpg" alt="055" /></a></p>
<p></p>
<p><a href="http://takinx.dcnblog.jp/.shared/image.html?/photos/uncategorized/2018/08/16/056.jpg" onclick="window.open( this.href, '_blank', 'width=800,height=600,scrollbars=no,resizable=no,toolbar=no,directories=no,location=no,menubar=no,status=no,left=0,top=0' ); return false"><img class="asset  asset-image at-xid-photo-55964615" style="width: 300px; display: block;" title="056" src="http://takinx.dcnblog.jp/radio_kit_/images/2018/08/16/056.jpg" alt="056" /></a></p>
<p></p>
<p><a href="http://takinx.dcnblog.jp/.shared/image.html?/photos/uncategorized/2018/08/16/057.jpg" onclick="window.open( this.href, '_blank', 'width=800,height=600,scrollbars=no,resizable=no,toolbar=no,directories=no,location=no,menubar=no,status=no,left=0,top=0' ); return false"><img class="asset  asset-image at-xid-photo-55964616" style="width: 300px; display: block;" title="057" src="http://takinx.dcnblog.jp/radio_kit_/images/2018/08/16/057.jpg" alt="057" /></a></p>
<p></p>
<p>、、、と　JA1AYO 丹羽OMの記事で紹介されていた写真で刺激をうけて乗算でやってみた。　高い周波数の信号をここまで入れる必要はない。　</p>
<p></p>
<p>以上、</p>
<p></p>
<p>通算258作目になる。</p>
<p>「基板ナンバー　RK-23(暫定)」は9月から領布開始予定。　ジャンパーピンによる切り替えで「加算回路　⇔　乗算回路」の機能も追加してリリース予定。</p>
<p></p>
<p></p>
<p><a href="http://takinx.dcnblog.jp/.shared/image.html?/photos/uncategorized/2018/08/25/082.jpg" onclick="window.open( this.href, '_blank', 'width=800,height=600,scrollbars=no,resizable=no,toolbar=no,directories=no,location=no,menubar=no,status=no,left=0,top=0' ); return false"><img class="asset  asset-image at-xid-photo-55981324" style="width: 300px; display: block;" title="082" src="http://takinx.dcnblog.jp/radio_kit_/images/2018/08/25/082.jpg" alt="082" /></a></p>
<p>おそらくは「パルス変調による　二つの信号」を用意して均等加算したものをSSB TXに入れるのが良いと想う。　今回は刊行本記載の写真波形の再現を目的としたトーン信号発生基板。</p>
<p>*********************************</p>
<p>過去記事になるが、参考に加算回路による　ツートーン波形を紹介。　<a href="http://takinx.dcnblog.jp/radio_kit_/cat9492735/">キャリブレーションのキット。</a></p>
<p><a href="http://takinx.dcnblog.jp/.shared/image.html?/photos/uncategorized/2018/08/17/558.jpg" onclick="window.open( this.href, '_blank', 'width=800,height=600,scrollbars=no,resizable=no,toolbar=no,directories=no,location=no,menubar=no,status=no,left=0,top=0' ); return false"><img class="asset  asset-image at-xid-photo-55965998" style="width: 300px; display: block;" title="558" src="http://takinx.dcnblog.jp/radio_kit_/images/2018/08/17/558.jpg" alt="558" /></a></p>
<p>上のように最大値と最少値が同時にはならない。</p>
<p>下のは高い周波数をかなり持ち上げてみたもの。輪郭が出てしまう。　刊行本のは輪郭が連続線ではない。</p>
<p><a href="http://takinx.dcnblog.jp/.shared/image.html?/photos/uncategorized/2018/08/17/562.jpg" onclick="window.open( this.href, '_blank', 'width=800,height=600,scrollbars=no,resizable=no,toolbar=no,directories=no,location=no,menubar=no,status=no,left=0,top=0' ); return false"><img class="asset  asset-image at-xid-photo-55965999" style="width: 300px; display: block;" title="562" src="http://takinx.dcnblog.jp/radio_kit_/images/2018/08/17/562.jpg" alt="562" /></a></p>
<p></p>
<p>「アマチュアのIC応用製作」に紹介されている波形には、加算回路ではまあ為らないね。</p></div>
]]>
</content>


    </entry>
 
</feed>